
Whether you’re playing as the Alliance or Horde, this dungeon is one that’s completed by practically everybody. At level 50, you’ll receive a quest from your trainer, dependent on your alignment. If you’re Horde, you’ll get the Pool of Tears, whereas Alliance will receive Into the Temple of Atal’Hakkar. These quests will direct you to the Sunken Temple, and it actually is very accessible regardless of your alignment: it’s more of a neutral dungeon. Following the quest pathway to completion which will provide you with items that are highly used by level 60 players.
The Sunken Temple can seem time-consuming, but it’s one of the only sources of some best-in-slot gear. Not only that, but it also provides a great deal of experience towards your journey to level 60 in classic WoW. As such, mastering this dungeon is very valuable.
Party Setup
Shamans, in particular, are great to bring along due to their Tremor Totem ability. Dwarf Priests are also helpful, due to their Fear Ward abilities. Both of these classes will render the Fears you encounter highly ineffective against your party. If you do not have anyone that can make the Fear’s effects negligible, it’s important to have someone dedicated to using crowd control abilities. A Rogue, for instance, can cast Sap which will incapacitate a given target for 60 targets instantaneously. A Hunter’s pets can have abilities that will slow and stun your opponents. Another example would be a mage can cast Frost Nova which has an area effect of freezing enemies for 8 seconds.
For your tank, it is preferable to have a Warrior. Their abilities really outshine other tank classes for this dungeon. Overall, you will want 3 classes focused on delivering damage, only one tank and one healer. Plan your party based on the above advice, and you’ll be set to go.
Bosses
The first boss you’ll be pitted against is the Spawn of Hakkar. It’s worth considering that there are two Spawns of Hakkar, so whilst it may seem easy, you’re going to encounter another on patrol as well. This boss can use an ability called Acid of Hakkar, which is a poison that’ll be triggered every 2 ticks against you for up to a minute. They can drop blue and green items, for instance: the Slitherscale Boots. However, the game technically considers them as a miniboss. As such, there’s a slight chance that they may not drop anything whatsoever.
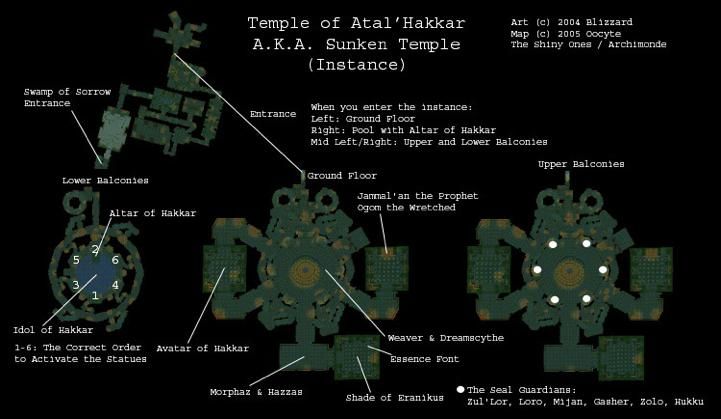
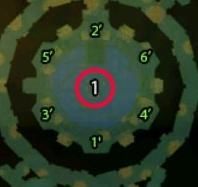
The next encounter will be with a boss named Atal'alarion. Before you begin, head to the basement to reach the centre of the pool/Pit of Refuse. Clear any mobs that are present there, or you’ll be faced to deal with all 3 of them in conjunction with the upcoming boss fight. To summon the boss at the Pit of Refuse, you must decipher the puzzle. The correct statue order is this:
Click on them in the correct order to summon Atal’alarion. This boss requires that your tank works effectively to absorb the damage. Atal’alarion has two abilities:
Ground Tremor, stunning nearby enemies for two seconds. To counter this, maintain some distance.
Sweeping Slam, which is a cleave-type ability that sends anyone directly in front of the boss directly upwards into the air.
The next set of bosses will be 6 troll mini bosses, all in a ring formation. You will be able to conquer these without any difficulty. They merely use basic abilities and perform basic actions such as summoning totems. The encounters at this stage are all fairly rudimentary. However, you must ensure to kill all of these mini bosses to continue the dungeon.
You’ll then face Jammal'an the Prophet alongside his companion, Ogom the Wretched. Ensure you clear the room before beginning the fact, otherwise, all mobs in the room will be chained and directed towards your party. The strategy in defeating these two bosses is to firstly focus on Ogom. Ogom is a substandard caster, using typical abilities such as shadow bolt. Ogom will also use abilities such as Shadow Word: Pain, inflicting continuous damage, albeit at a reduced rate. He can also inflict Curse of Weakness on your party. By getting rid of him early on, you can focus on what truly matters and is difficult: Jammal’an.
Jammal’an has a special ability named after him: Hex of Jammal'an. This ability is particularly dangerous, as it turns one of your own party members against you. It casts a hex whereby they are transformed into a troll and will receive a damage modifier of 400%. The boss has an area damage effect, but it is quite negligible in comparison to its healing ability which is quite substantial. Whenever the boss attempts to heal, you should attempt to disrupt it, else, you’re back to ground zero. Jammal’an will also spawn Earthgrab Totems: you must defeat these as soon as they appear, otherwise, they can render party members defenseless and useless.
After defeating Jammal’an, you can proceed back to the main hall. You’ll be greeted by two elite green drakes that are paired together, Hazzas and Morphaz. They are considered minibosses, but defeating them is required to proceed, and they cannot be fought individually. Their abilities are the following:
Wing Flap - they’ll thrash their wings, knocking anyone in range backwards.
Acid Breath - if you’re directly in front of one of them, you’ll instantly be hit with some nature damage. If you do not move, you will continuously be inflicted with 3 damage for 15 seconds.
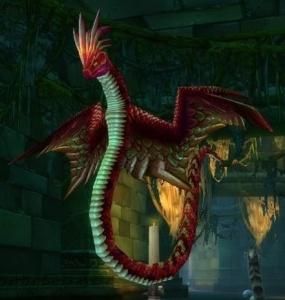
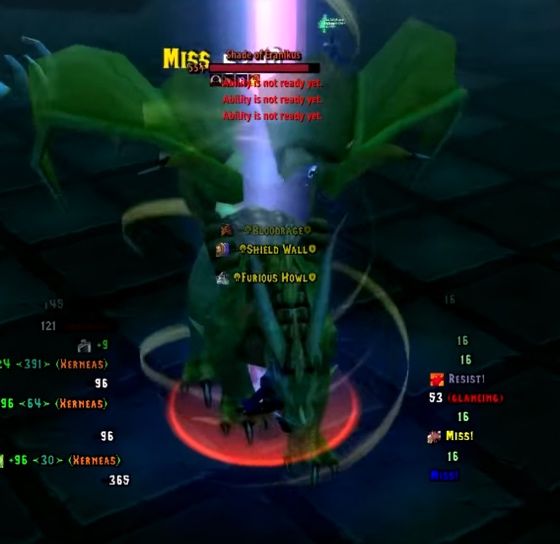
Now, we move onto the final boss: Shade of Eranikus. As you might expect, defeating this boss isn’t easy by any stretch of the imagination. To begin with, the boss will call allies for assistance - ensure you’ve cleared them all out.
The boss will usually use War Stomp at the start of the fight. Anyone who directly attacks him upfront from 0 yards will be fully stunned for 5 seconds. Your tank should approach the boss, and a focus should be placed on healing the tank.
Eranikus has Thrash and Acid Breath: inevitably, you’ll have seen these abilities before. Thrash will allow the boss to have additional hits against you, but these abilities are nothing compared to Deep Slumber. Once Eranikus invokes Deep Slumber, a random party member will be rendered useless for 10 seconds - placed into a deep sleep. If the Healer is affected by Deep Slumber, any available hybrid class must be prepared to assume the role of healer instantaneously. Paying proper attention to the fight is crucial to ensure success.
Thanks for reading our guide, and we hope it was useful! Now that you’re informed on the mechanics of all bosses in Sunken Temple, you should be ready to give it a go. If you’re facing any challenges, you must ensure to preserve and learn from your mistakes. Many best-in-slot gears items can only be obtained from this dungeon, such as the drakestone for casting-based WoW classes. By the way, to enjoy all the features in the game, players can buy wow classic gold from MyWOWGold.